- Home
- Birthday Cards
- Handmade Birthday Cards
Quick and Simple Handmade Birthday Cards Using Ribbons, Buttons, Beads and Silk Flowers
These handmade birthday cards were created in one weekend. My niece wanted to celebrate her birthday and so asked me to help her create some birthday invitation cards.
A week before, I had purchased 3 bags of assorted buttons and a garland of silk flowers at a sale. So naturally, when she requested to make her birthday invitation cards, my first thought was to use the buttons and silk flowers. In the end, what we made were a whole batch of birthday cards instead of birthday invitations.
And though she was too young to sew the buttons onto the silk flowers, she did helped me cut and put the double-sided tape and attached the flowers to the front of the birthday cards.
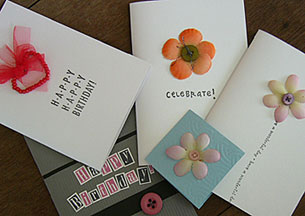
Here's a picture of all the homemade birthday cards we made that weekend.
Quick Handmade Birthday Cards with Silk Flowers
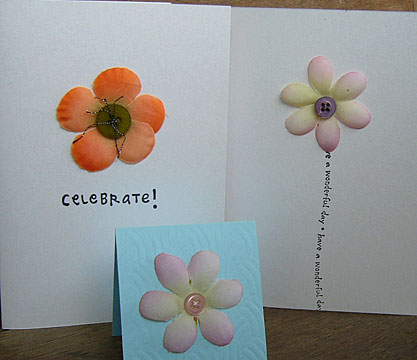 Birthday Cards with Silk Flowers
And here are the silk-flower and button handmade birthday cards I created with my niece's help.
Also look below at images of each individual card.
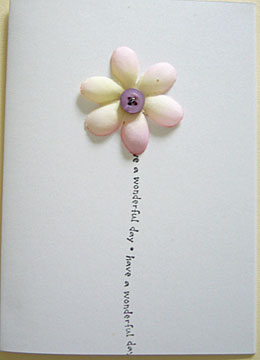 Have a Wonderful Birthday!
Supplies needed for making this birthday card are card blank, silk-flower, button, thread, needle, double-sided tape, scissor and word rubber stamp "have a wonderful day" by Hero Arts Rubber Stamp.
Just sew the button to the silk flower using thread and needle. Then adhere the silk flower to the front of the card with double-sided tape. Stamp the word "have a wonderful day" just below the silk flower to create the flower stalk.
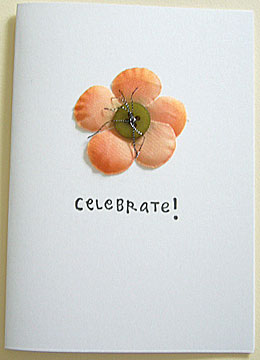 Button and Silk Flower To Celebrate This Happy Day
This is another card created using silk flower and button. The only difference is the word rubber stamp used - "celebrate!". I believe this was the card design we used for the birthday invitations. All we needed was the birthday invitation wordings inside the card.
Red Beaded Heart Handmade Birthday Greeting Card
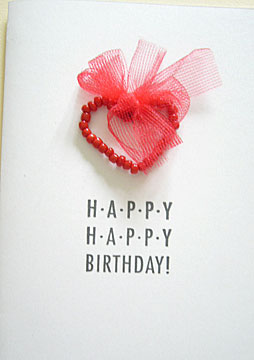 Red Beaded Heart Birthday Card
Supplies needed for making this card are red beads, wire, ribbon and word rubber stamp - Happy Birthday!
String the beads onto the wire. Twist the ends of the wire together neatly. Form into a heart shape and tie a red ribbon on the joint. Attach to front of card with double-sided tape. Then stamp "Happy Birthday" just beneath the beaded heart.
This is the same beaded heart pattern used on the Happy Mother's Day card.
Easy-to-Made Masculine Birthday Card
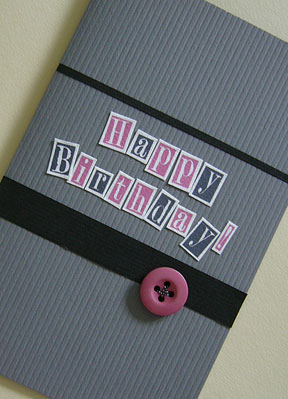 Masculine Birthday Card
Supplies needed for the above birthday card are grey, black and white cardstocks, glue, computer generated alphabets - Happy Birthday!, button, thread and needle.
Just cut black strips of paper and glue to the front of the grey card blank. Trim the computer generated alphabets and arrange and glue onto the front of the card in between the black strips.
Then sew the button just to the button right of the card. (Refer to the picture above for positioning). I think this is a simple and quick birthday card to make for male friends or family members.
Viola! A batch of quick and simple handmade birthday cards. Hope you like them.
Like This Site?
|
| |
Celebrating Creativity! Connecting Lives!
~ bringing cheer one card at a time.
Help Me Get The Word Out

If you like making greeting cards and want to encourage others to do so because of its many benefits, please help me share this website with your friends. Just click on the share buttons below to share with your fans and friends. Thank you for sharing the good things in life :-)


New! Comments
Have your say about what you just read! Leave me a comment in the box below.