- Home
- Birthday Cards
- Make Easter Cards
Easy To Make Easter Cards
Make Easter Cards with rubber stamps that are not meant for making Happy Easter greeting cards. See how I created cards for this special holiday with two Hero Arts Collage stamps.
Tips!
1. Click on any image on this page to view a Picture Gallery of all images.
2. Click here to view more Easter Card Ideas.
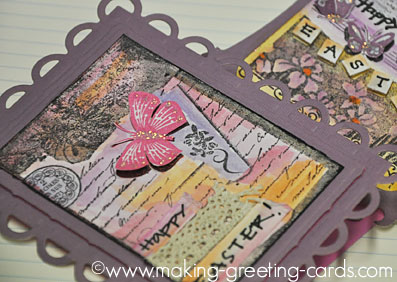
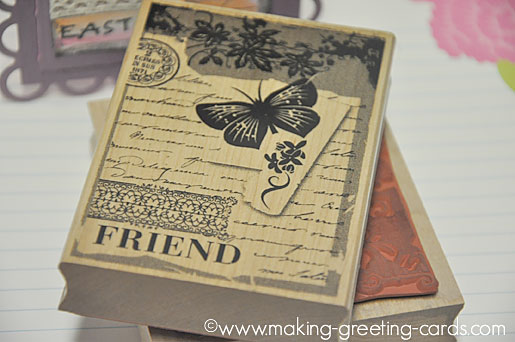
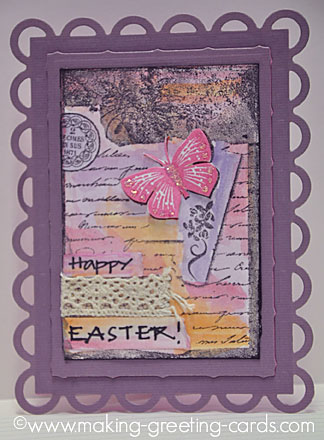
The first one is made using the Collage Friend rubber stamp by Hero Arts (H4772). All I did was to cover up the word 'FRIEND' with a strip of white card, watercolored and handwrote the word 'EASTER'. I also added another strip above the lace ribbon with the handwritten word 'Happy'.
Instructions To Make Easter Cards
Happy Easter Card #1
Supplies Used:
- 17cm x 12cm pink card
- 11cm x 14cm plum color textured card
- 7cm x 10cm white color card
- white color card scrap
- Hero Arts rubber stamp (H4772) Collage Friend
- Memento ink pad - Tuxedo Black
- Memento ink pad - Rose Bud
- watercolors - orange, pink, violet
- brush and clean water
- double-sided foam tape
- glue or double-sided tape
- trimmer
- scissors
- glitter glue
- fine black marker 0.8 - pigment ink
- CutterBug machine and cutting and embossing kit
- Spellbinders Frameabilities - Scalloped Edge Frame
Step-by-step Instuctions:
- Score and fold pink card at 8.5cm to make a basic card.
- Cut and emboss plum color card with the Scalloped Edge Frame die on the CutterBug machine.
- Ink collage friend stamp with tuxedo black ink and stamp image on white card.
- Cut two strips of white card and write Happy and EASTER with black marker.
- Paint stamped collage image and handwritten Happy EASTER strips with watercolors.
- Trim collage with scissors.
- Adhere lace ribbon and words with glue.
- Ink butterfly on the collage stamp with Rose Bud color.
- Stamp image on small white card.
- Trim and glue body of butterfly to collage.
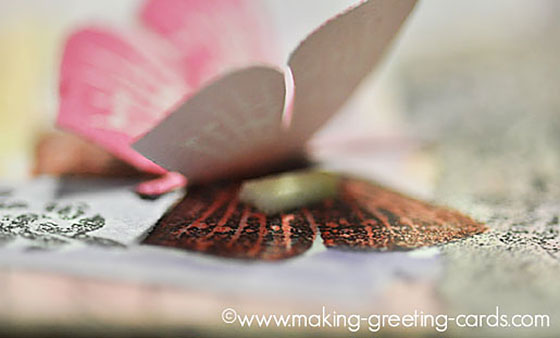
- Cut two tiny double-sided foam tapes and adhere under the butterfly's wings. (refer photo below)
- Glue plum color scalloped edge frame to the pink folded card.
- Glue the collage onto the inner piece of the Scalloped Edge frame.
- Apply double-sided foam tape to inner piece and attach onto the pink folded card at the centre of Scalloped Edge frame.
- Apply glitter glue to body of butterfly as well as dots on the wings.
That's how easy it is to make the Easter card above. It does take a bit of time to cut and emboss the frame but the end result is worth the trouble.
Now, have a look at the second easy to make Easter card below.
Happy Easter Card #2
Supplies Used:
- 16cm x 10cm white card
- 11cm x 15cm plum color textured card
- 9cm x 10cm white color card
- white color card scrap
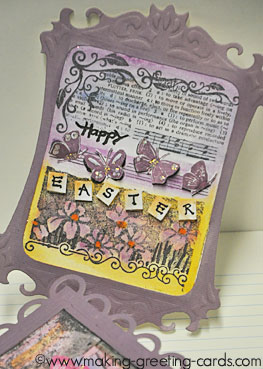
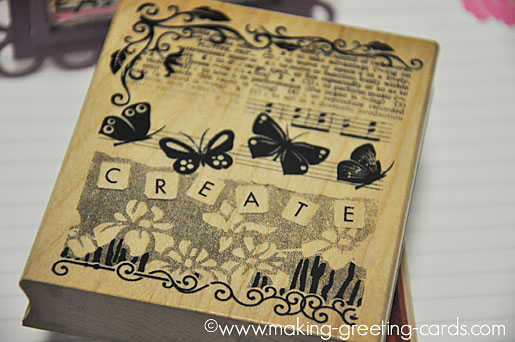
- Hero Arts rubber stamp (H4776) Collage Create (refer photo below)
- Memento ink pad - Tuxedo Black
- Memento ink pad - Sweet Plum
- watercolors - orange, blue, violet
- brush and clean water
- double-sided foam tape
- glue or double-sided tape
- trimmer
- scissors
- glitter glue
- orange color marker
- fine black marker 0.8 - pigment ink
- CutterBug machine and cutting and embossing kit
- Spellbinders Frameabilities - Classic Frame
Step-by-step Instructions:
- Score and fold white card at 8cm to make a basic card.
- Cut and emboss plum color card with the Classic Frame die on the CutterBug machine.
- Ink collage create stamp with tuxedo black ink and stamp image on white card.
- Cut a strip of white card about 1cm wide.
- Mark with pencil and write E A S T E R with black marker.
- Cut out each letter and apply double-sided foam tape on each.
- Adhere to the top of C R E A T E.
- Paint stamped collage image and handwritten E A S T E R letters with watercolors.
- Trim collage with scissors.
- Ink butterflies only on the collage stamp with Sweet Plum color.
- Stamp image on small white card.
- Trim and glue respective bodies of butterflies to collage.
- Cut tiny double-sided foam tapes and adhere under the butterfly's wings.
- Glue collage onto the centre of the white folded card.
- Glue plum color classic frame onto the collage card.
- Apply glitter glue to body of butterfly as well as dots on the wings.
- Handwrite 'Happy' on collage above the butterflies.
That's it! Two easy to make Easter cards using non-Easter rubber stamps.
More Easter Greeting Cards
- Do not open until Easter | Easter Blessings to You!
- Happy Easter | Easter Blessings
- Easter Egg Greetings
- Happy Easter Step Card
Like This Site?
|
| |
Celebrating Creativity! Connecting Lives!
~ bringing cheer one card at a time.
Help Me Get The Word Out

If you like making greeting cards and want to encourage others to do so because of its many benefits, please help me share this website with your friends. Just click on the share buttons below to share with your fans and friends. Thank you for sharing the good things in life :-)

New! Comments
Have your say about what you just read! Leave me a comment in the box below.